Sorry, A WHAT Map
Ibrahim Saberi
July 4, 2019
Synoptic Maps In Angular
We’re currently deep in the build process of the Viewify 2MVP. So naturally, I’m scrolling through Hacker News and DEV.to. In my DEV.to feed, someone posed a question about how you would approach a synoptic map in Angular.
…wait, a what kind of map?
Well, that didn’t help me at all.
Though I understood what was trying to be achieved through Vitor’s description, I googled around to figure out what synoptic maps were commonly used for.
It hit me pretty quickly:
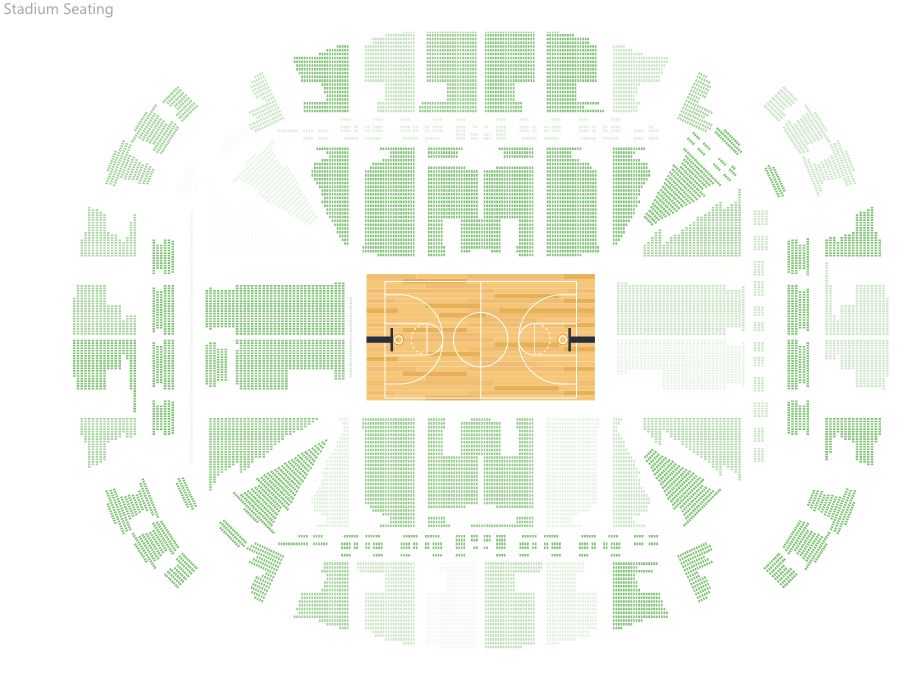
When you’re using Eventbrite, or Fandango, and you’re selecting your seating arrangements, the representation and then selection of a seat is a kind of synoptic map.The only actual tech-related reference I can find to the name “synoptic map” or “synoptic panel” came from a Power BI tool that does exactly this. Outside of easily Google-able tech applications, it seems like it’s pretty popular amongst topography/ metereology types, which makes a ton of sense.
So the basic premise is really simple. You have an image or graphical representation where different areas have some kind of context tied to them.
I Am Simple Webdev. Please Speak Slowly
Converting that to webdev speak isn’t too difficult either. I’ve been pretty high on HTML5 canvas for the past couple of hours after seeing this blog post on recreating the DEV.to offline page. Recreating the functionality of a synoptic mapI’m honestly not sure how to distinguish between this vs. synoptic panels and at this point I’m too afraid to ask. would be a great way to learn more about the Canvas API.
I’m not sure how or why Angular exactly fits in, but I could probably figure out a way to include RxJS in this, and it would also potentially make a cool standalone component!
So the requirements are simple:
- A canvas,
- contained in an Angular component,
- that takes an image as an input,
- allows for rectangular areas to be selected,
- and then have input associated with those rectangular areas,
- all while using only the Canvas API (and RxJS maybe)
That last part is the trickiest, and probably also the dumbest. I’m literally writing this blog post as I’m building this, so we’ll see if the Canvas API is too complex for me and I just defer to one of the many JS graphics librariesI’m not doing this in the first place because I’m too afraid to commit to any single one. .
This is actually the first time I got to use Angular 8, and after installing the new Angular CLI I was greeted by this at the end of the CLI app creation process:

I hear that Privacy Policy page just displays your life story before stating “thanks for providing all this neat info.”
Setup in the project is pretty easy. We create a component called synoptic-map and throw its generated selector into the app.component.html. We’ll also throw a basic canvas (and name it #canvas too while we’re at it) into the synoptic-map component:
//app.component.html
<app-synoptic-map></app-synoptic-map>

//synoptic-map.component.html
<canvas #canvas></canvas>
And then let’s set up some basic stuff in the component’s .ts file:
//synoptic-map.component.ts
export class SynopticMapComponent implements AfterViewInit {

  @ViewChild('canvas',{ static: false }) public canvas: ElementRef;

  @Input() public imageString;

  constructor() { }

  ngAfterViewInit() {
  }

}
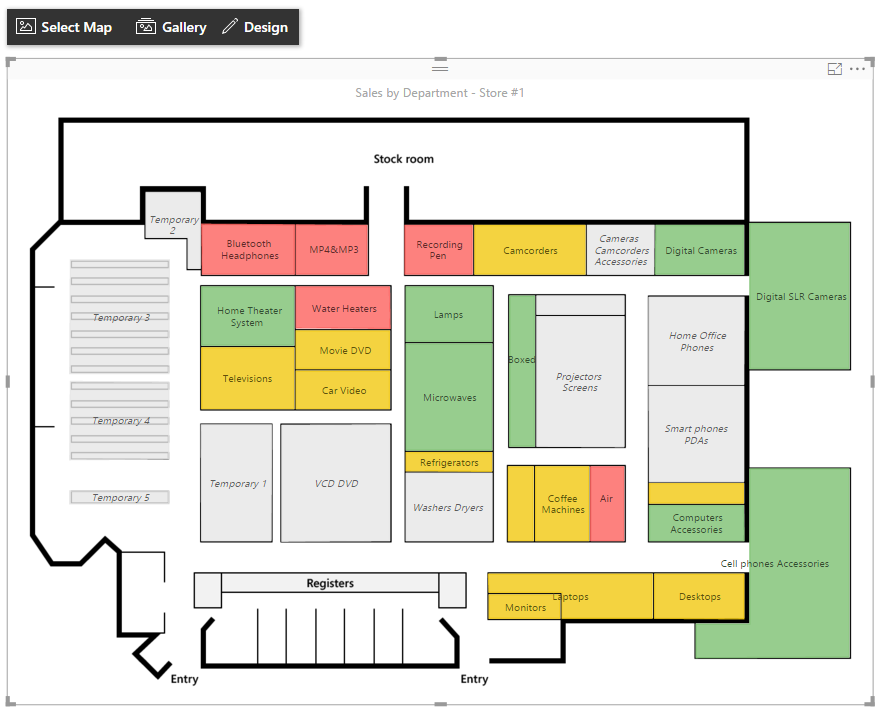
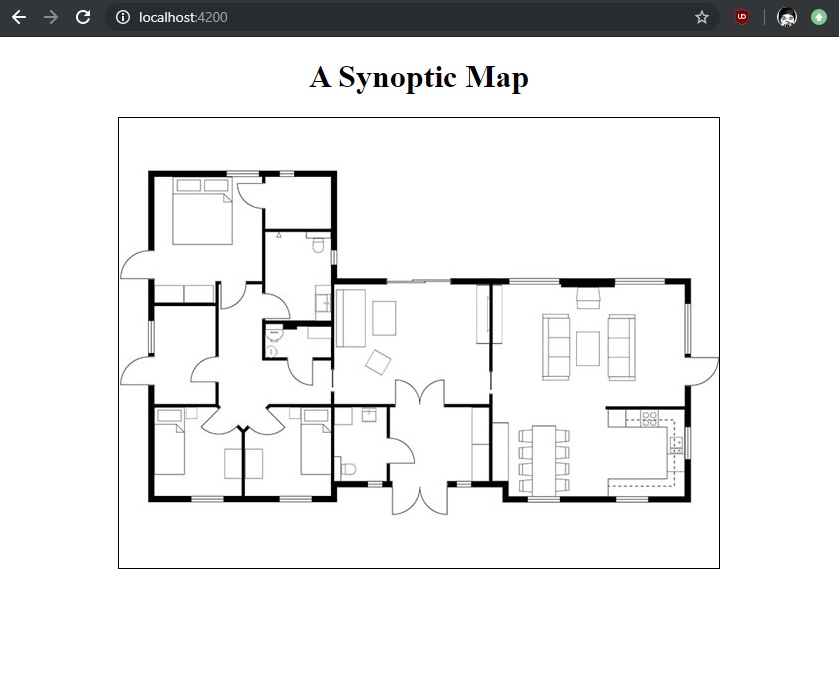
So we create a basic input in the template for the image. I’m gonna be using this one:

This floorplan is ideal because it’s mostly rectangles. That’s really the only criteria I looked for.
So we pass the image src file as a propReact has ruined me and we then draw that on the canvas:
//synoptic-map.component.ts
export class SynopticMapComponent implements AfterViewInit {

  @ViewChild('canvas',{ static: false }) public canvas: ElementRef;

  @Input() public imageString: string;

  public image = new Image();

  private cx: CanvasRenderingContext2D;

  constructor() { }

  ngAfterViewInit() {
    const canvasElementRef: HTMLCanvasElement = this.canvas.nativeElement;
    this.cx = canvasElementRef.getContext('2d');

    this.image.onload = () => {
      canvasElementRef.width = this.image.width;
      canvasElementRef.height = this.image.height;

      this.cx.drawImage(this.image,0,0);
    };

    this.image.src = this.imageString;
  }
}
NOTE: I’m using the AfterViewInit lifecycle hook since all of the canvas logic can only really be done after the component view has been fully initialized. If we used the OnInit lifecycle hook, we’d end up doing stuff before the canvas element has been initialized.
In our AfterViewInit lifecycle hook we create a reference to the canvas element, and then we get the 2d context of that element. We also have an uninitialized Image that in the AfterViewInit lifecycle hook is then provided an onload function. That onload function resizes the canvas to the dimensions of the image, and then draws the image onto the canvas. We then finally set the src of that image to the provided src string so the image loads can begin to load.
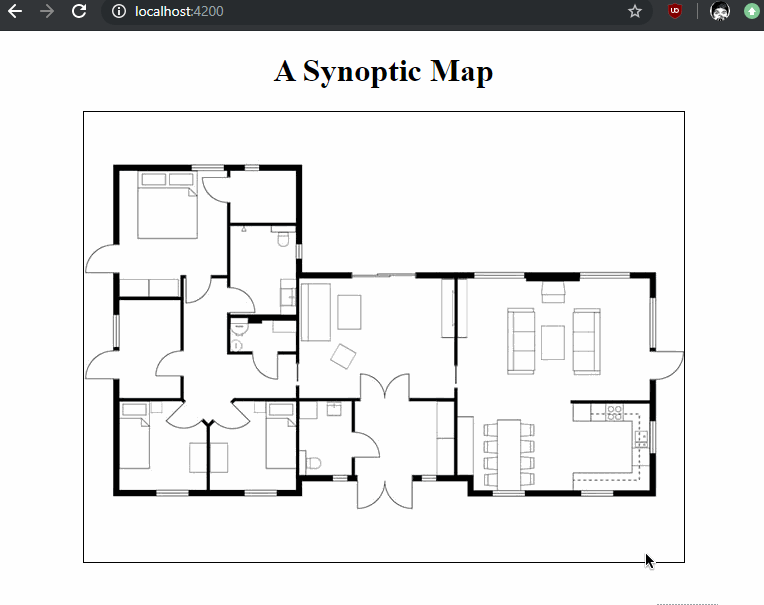
So we save and run this, and we now have a canvas that renders our image!
That was pretty easy. Now we want to enable drawing on this map. The Canvas API makes this possible in the 2d context through the use of beginPath(), moveTo(x, y) to set an initial position, lineTo(x, y) to indicate an end position, and then stroke() to actually draw the line.
Dealing with MouseEvents
I looked for an easy RxJS solution to this, and it turns out this has already been doneThanks @tarik.nzl! . I basically plugged this directly into my current solution. First we create a captureEvents(canvas) method that takes our canvas element reference as an input and call it at the very end of our AfterViewInit lifecycle hook:
ngAfterViewInit() {
  //...all that other stuff

  this.captureEvents(canvasElementRef);
}

private captureEvents(canvas: HTMLCanvasElement) {
  fromEvent(canvas, 'mousedown')
    .pipe(
      switchMap(e => {
        return fromEvent(canvas, 'mousemove')
          .pipe(
            takeUntil(fromEvent(canvas, 'mouseup')),
            takeUntil(fromEvent(canvas, 'mouseleave')),
            pairwise()
          )
      })
    ).subscribe((res: [MouseEvent, MouseEvent]) => {
      const rect = canvas.getBoundingClientRect();

      const prevPos = {
        x: res[0].clientX - rect.left,
        y: res[0].clientY - rect.top
      };

      const currentPos = {
        x: res[1].clientX - rect.left,
        y: res[1].clientY - rect.top
      };

      this.draw(prevPos, currentPos);
    })
}
This function uses RxJS fromevent to create an observable that emits when you mouse down on the canvas element. When that observable emits (i.e. when you mouse down), we then listen for mousemove event until we mouse up or leave the canvas.
While we’re listening to mousemove, we use the pairwise() operator to emit the previous and current MouseEvent values. We then subscribe to that and call a draw function that takes the actual X and Y coordinates of the previous and current positions of the mouse and then draws that as a line.
That function looks like this:
private draw(prev: {x:number,y:number}, current: {x:number,y:number}) {
  this.cx.beginPath();

  if(prev) {
    this.cx.moveTo(prev.x, prev.y);
    this.cx.lineTo(current.x, current.y);
    this.cx.stroke();
  }
}
The end result looks like this:
Pretty spooky.
This doesn’t actually get even close to accomplishing what we want though! What we really want to do is save the initial mousedown position, draw a continuously updating rectangle that spawns at the mousedown position and has an opposing vertex at the current mouse position, all while the mousemove event is firing. Then when the mouseup or mouseleave event fires we want “stuff” to happen.
Dealing with MouseEvents, But Like Actually
We can reuse most of the previous code.
To record the initial mouse position on mousedown, we can just add a boolean that’s changed immediately when the mousemove event first emits:
public currentlyDrawing: boolean = false;
public beginX: number;
public beginY: number;

private captureEvents(canvas: HTMLCanvasElement) {
  fromEvent(canvas, 'mousedown')
    .pipe(
      switchMap(e => {
        return fromEvent(canvas, 'mousemove')
          .pipe(
            takeUntil(fromEvent(canvas, 'mouseup')),
            takeUntil(fromEvent(canvas, 'mouseleave')),
          );
      })
    ).subscribe((res: MouseEvent) => {
      const rect = canvas.getBoundingClientRect();

      if(!this.currentlyDrawing) {
        this.currentlyDrawing = true;
        this.beginX = res[0].clientX - rect.left;
        this.beginY = res[0].clientY - rect.top;
      }

      const currentPos = {
        x: res[1].clientX - rect.left,
        y: res[1].clientY - rect.top
      };

      this.draw(currentPos);
    });
}
I’ve removed the pairwise operator since we don’t really care about both the “previous” and “current” mouse positions, we just need the current one and the initial one (that’s saved at the very beginning of drawing) for the rectangle coordinates.
We then add a separate event handler for the mouseup event that resets currentlyDrawing to false:
private captureEvents(canvas: HTMLCanvasElement) {
  //all that other stuff

  fromEvent(canvas, 'mouseup').subscribe(e => this.currentlyDrawing = false);
}
And to actually handle drawing the rectangle, we modify our draw function like such:
private draw(current: {x:number,y:number}) {
  this.cx.clearRect(0,0,this.canvas.nativeElement.width,this.canvas.nativeElement.height);
  this.cx.drawImage(this.image,0,0);

  if(current) {
    this.cx.strokeRect(this.beginX,this.beginY,current.x-this.beginX,current.y-this.beginY);
  }
}
Every time we call draw we want to clear the canvas first, because otherwise you get this mess:
The canvas doesn’t know that you only care about the current rectangle on screen. So you need to clear it, redraw the image (since clearing the canvas also clears the image), and then draw the rectangle.I used strokeRect here because the implementation is simpler, the params are your beginning x and y coordinates, and then the width and height of the rectangle.
Once you do that, your rectangle will draw in a buttery smooth fashion:

However, every time you start drawing a new rectangle, the previously drawn one disappears! What we want is once the mouseup event fires, we want to save that current rectangle and then draw it each time we update the canvas in our draw() function.
This is actually really easy to implement:
public rectangles: {
  x: number,
  y: number,
  w: number,
  h: number,
  c: string,
}[] = [];

public colors: any[] = [
  "rgba(125,131,255,0.3)",
  "rgba(000,125,255,0.3)",
  "rgba(026,255,213,0.3)",
  "rgba(255,103,000,0.3)",
  "rgba(099,026,138,0.3)",
]

public colorCounter: number = 0;

private captureEvents(canvas: HTMLCanvasElement) {
  //all the mousedown/ mousemove stuff...

  fromEvent(canvas, 'mouseup').subscribe((e: MouseEvent) => {
    if(this.currentlyDrawing) {
      this.currentlyDrawing = false;

      const rect = canvas.getBoundingClientRect();
      const currentX = e.clientX - rect.left, currentY = e.clientY - rect.top;

      const rectangle = {
        x: this.beginX, y: this.beginY,
        w: currentX - this.beginX, h: currentY - this.beginY,
        c: this.colors[this.colorCounter%this.colors.length]
      };

      this.colorCounter++;
      this.rectangles.push(rectangle);
      this.draw();
    }
  })
}

private draw(current?: {x:number,y:number}) {
  this.cx.clearRect(0,0,this.canvas.nativeElement.width,this.canvas.nativeElement.height);
  this.cx.drawImage(this.image,0,0);

  for(let i=0; i < this.rectangles.length; i++) {
    this.cx.fillStyle = this.rectangles[i].c;
    this.cx.fillRect(this.rectangles[i].x,this.rectangles[i].y,this.rectangles[i].w,this.rectangles[i].h);
  }

  if(current) {
    this.cx.strokeRect(this.beginX,this.beginY,current.x-this.beginX,current.y-this.beginY);
  }
}
So when the mouseup event fires, we save the rectangle on the screen to a rectangles array in the component. We then call the draw() method again (and we change draw() so that the current param is optional) to draw the rectangle.
Whenever draw is called now, we iterate through this rectangles array and for each one, we set the canvas fill style to the color we specified when creating the rectangle (in this case the color is assigned by looping through that colors array), and then we draw the rectangle with a fill using that color.
The end result is Pretty Neat:

Since we have this rectangles array in the component now, we also have the basis for adding ~~~Some Cool Context~~~ to each rectangle.
First, in our actual template, let’s set up something that will display some REALLY basic info about our rectangles:
<div *ngFor="let rect of rectangles; index as i">
  <p>Rectangle {{ i }}</p>
  <p [ngStyle] = "{ 'color': rect.c }">Color: </p>
</div>
Saying “Rectangle 0” is kind of pointless at the moment since there’s nothing on the canvas to indicate which rectangle is which. Easy enough to fix:
//in the draw method, when we iterate through each
this.cx.font = "bold 24px Courier";
this.cx.fillStyle = this.rectangles[i].c;
this.cx.textAlign = "center";
const rect = this.rectangles[i];
const text = {x: Math.round((rect.x+(rect.x+rect.w)))/2, y: Math.round((rect.y+(rect.y+rect.h))/2)};

this.cx.fillRect(rect.x,rect.y,rect.w,rect.h);

this.cx.fillStyle = "#000";
this.cx.fillText(i.toString(),text.x-12, text.y+12);
So now whenever our colored rectangles are drawn, we also draw the index of that rectangle at its center.
Adding really basic “context” to each rectangle is easy. You can add an input element in the ngFor loop that has 2 way ([(ngModel)]) binding with a new property for each rectangle.
There’s a lot more you can do after this point.
Some additional things I ended up adding:
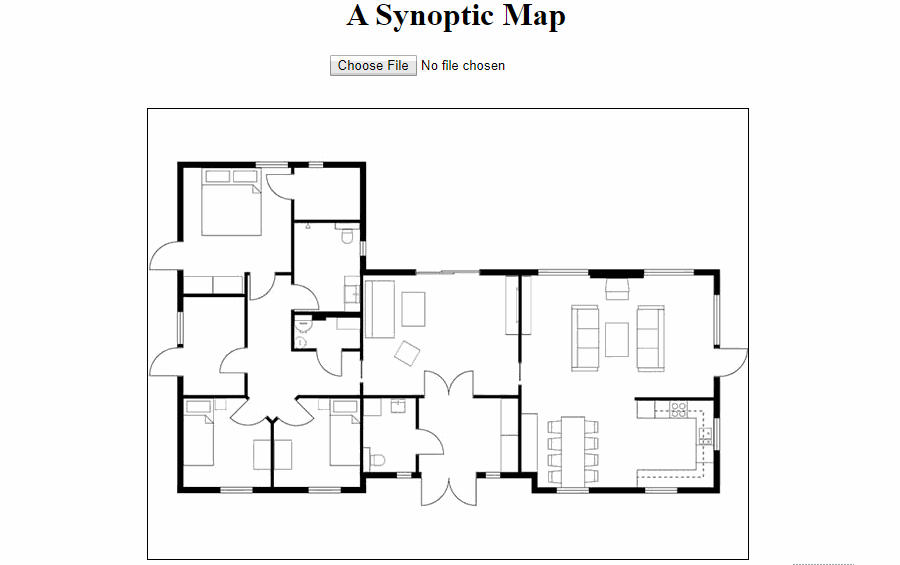
- Allow for a custom image to be uploaded
- Clicking on a rectangle focuses the input of its respective input element
- Hovering over a rectangle replaces the index with its input text
You could also easily add a utility that lets you upload initial rectange coordinates/ context, and then another that lets you download your final synoptic map.
Ending Notes
So that’s a really primitive synoptic map! You can see it live at georgeipsum.github.io/ngx-synoptic-map, or you can see the source code here.
All in all, I’m pretty happy with how simple it was to get up and running with the Canvas API. While not a lot was going on in this project, it felt like the ending canvas element was pretty performant and repeated Canvas API calls didn’t seem to really slow down my browser.
I was particularly surprised by how simple it was to load an external image onto a canvas. I was initially worried especially when it came to redrawing the canvas each time, but being able to plug and play with the Image() API made it super easy.
Dealing with text elements on a canvas absolutely feels very wonky, but I expect there are plenty of third party graphics libraries that will generally remedy that, so I’m not too worried there.
I’m interested in gamedev, and I’m very used to program flows along the lines of:
while(gameIsRunning) {
  processInputs()
  updateGame()
  drawGame()
}
and that loop runs continuously, meaning that your typical draw() function is constantly running. In this canvas implementation we only called draw() as needed as different elements were updated, which makes total sense since the amount of updates are finite and strictly user controlled.
To make the canvas update more consistently as opposed to whenever the user generated some input, we could probably use a setInterval that runs the draw() function at whatever interval that is (likely 60 times a second to get 60FPS).
So I’m excited to play around more with canvas in the future! This exercise has made it clear to me how simple it would be to get an HTML5 game up and running, so I’m probably gonna try that in the future as well.